Integrations
Connect Spark to external systems for data transport, including SFTP.
Workspace Integrations connect Spark to external systems for moving data in and out. They live under Administration in Settings, and the main one is SFTP. Agent connectors, which extend what your agents can do, are separate; see Connectors.
The Integrations page
Open Settings, then Integrations under Administration (the page is titled Integrations, with the note Manage your workspace integrations). The list shows each integration by Integration name and a Subscription column. The Subscription column is a read-only status indicator: a green check means the integration is subscribed and active for this workspace, a red mark means it is not. You don't click that column to change it; everything you do to an integration is on the ⋮ menu at the end of its row.
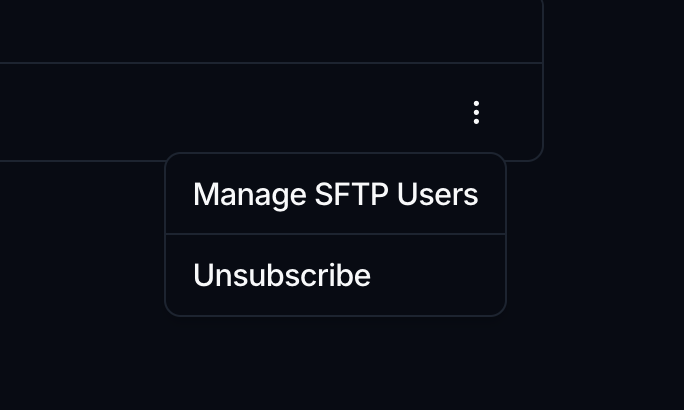
What the ⋮ menu offers depends on whether the integration is already subscribed:
- Not subscribed: a single Subscribe item.
- Subscribed: the integration's management action (for SFTP, Manage SFTP Users), plus Unsubscribe.
Availability of specific integrations depends on your plan and workspace configuration. If an integration you expect is missing from the list, it may not be enabled for your workspace.
Set up SFTP
SFTP lets a system or partner drop files into your workspace over a standard secure file transfer connection, without anyone opening the app. Files that land on the SFTP server are ingested just like an upload and can start a workflow the same way. Setting it up means subscribing to the SFTP integration, creating an SFTP user, registering one or more SSH public keys for it, and sharing the connection details with whoever sends the files.
Before you start
- You need administrator access to the workspace's settings.
- The SFTP integration must be available for your workspace; availability depends on your plan and configuration. If it isn't in the Integrations list, it isn't enabled for you.
- Have the sender's SSH public key ready (for example an
ssh-ed25519orssh-rsakey). Access is by key, so there's no password to set or share.
Step 1: Subscribe to SFTP
Before you can manage users, the integration has to be subscribed for this workspace.
- On the Integrations page, find the SFTP row and check its Subscription column. A red mark means it isn't subscribed yet.
- Open the row's ⋮ menu and click Subscribe.
Subscribing takes effect right away (there's no confirmation step), and the Subscription column turns to a green check. If you ever need to turn it off, the same menu offers Unsubscribe, which asks you to confirm first.
Step 2: Open the SFTP Users page
Once SFTP is subscribed, its ⋮ menu gains a Manage SFTP Users item. Click it to open the SFTP Users page, where you create and manage the accounts that connect. This item only appears while the integration is subscribed, so if you don't see it, complete Step 1 first.
Step 3: Create an SFTP user
- On the SFTP Users page, click New at the top right.
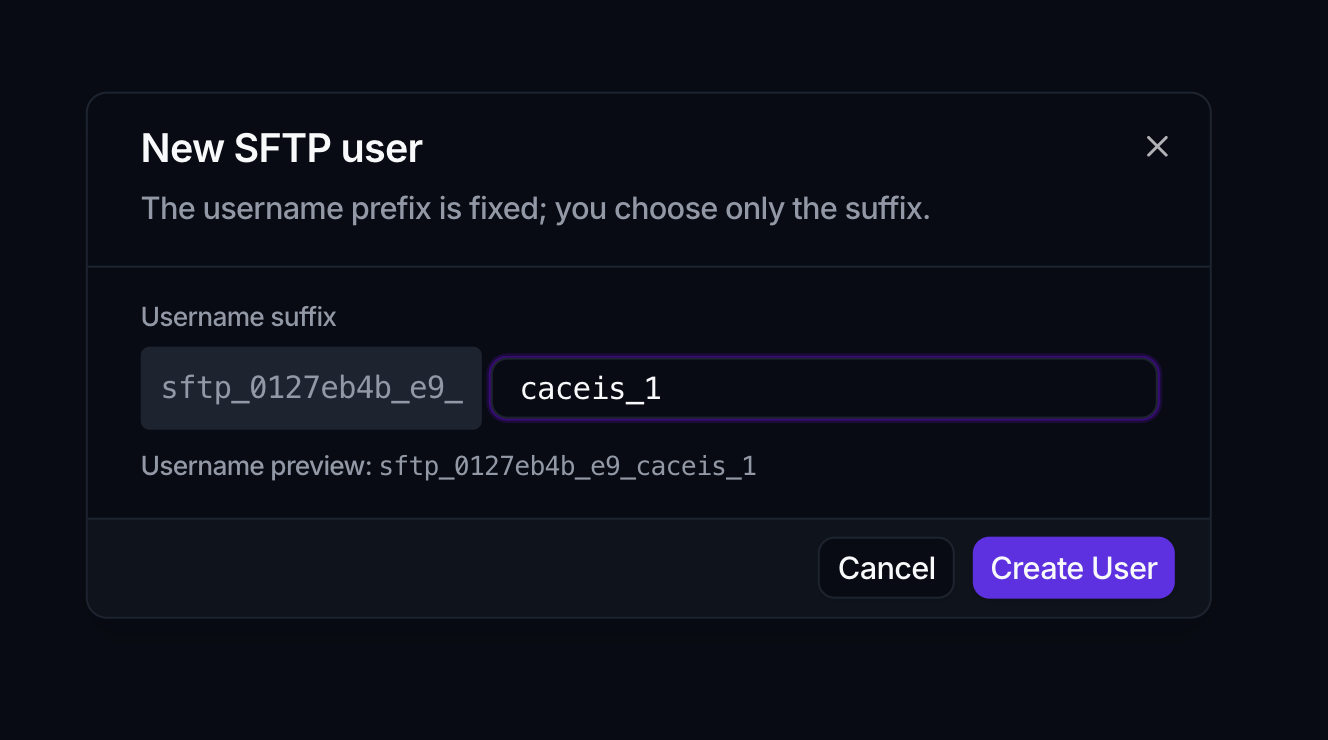
- In the New SFTP user dialog, enter a Username suffix. The prefix is fixed for your workspace and shown next to the field; you choose only the suffix.
- Check the username preview beneath the field, then click Create User.
Usernames use lowercase letters, digits, dashes, and underscores, and must start and end with a letter or digit. The full username is capped at 32 characters. Each user appears in the list with controls to copy its username, manage its keys, and delete it.
Step 4: Register the SSH keys
- In the users list, click the key control on the user.
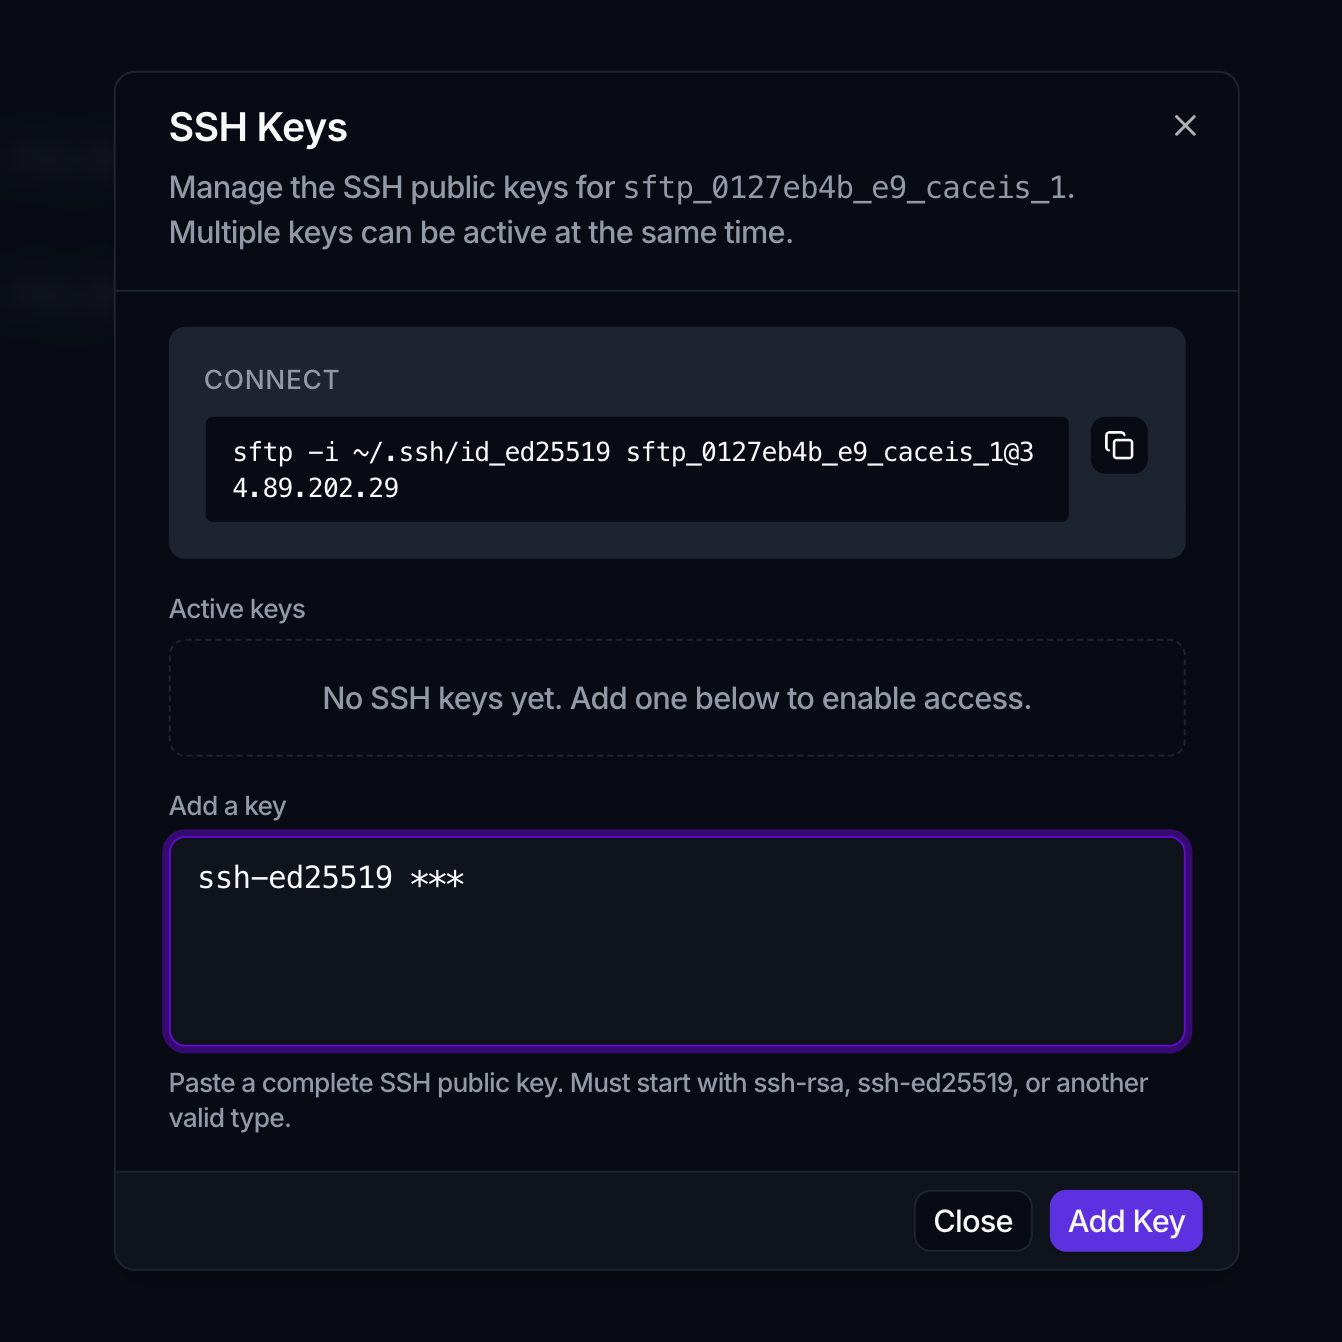
- The SSH Keys dialog opens. It shows a ready-to-copy Connect command for that user.
- Under Add a key, paste a complete SSH public key. It must start with a valid type such as
ssh-rsaorssh-ed25519. - Click Add Key.
Keys appear under Active keys, and multiple keys can be active at once, which is handy when several senders use the same user. Remove a key with its delete control to revoke that access.
Step 5: Share the connection details
Give the sender the Connect command from the SSH Keys dialog, which carries the username and host they need. Once their matching private key is in place, they can connect and drop files into the workspace.
What happens to arriving files
Files delivered over SFTP enter the same file store as uploaded files. A File Received workflow trigger treats manual upload, SFTP, and the shared email address as one arrival event, so the same automation can act on a file however it arrives. To act on incoming files automatically, see File-triggered workflows.
Deleting an SFTP user removes the user, its SSH keys, and its files on the SFTP server. This cannot be undone, so when you only need to rotate access, remove keys individually rather than deleting the user.
Where to go next
- Extend your agents instead: Connectors
- Act on incoming files: File-triggered workflows
- Organize files once they land: Organize files