Manage data views
Shape a data object's grid with columns, filters, sorting, aggregations and formulas, and save it all as a view.
A view is a saved way of looking at a data object: which columns show, in what order, how the records are filtered and sorted, what each column totals, and any formula columns you've added. Every data object starts with a default view, and you can build as many more as you need. This page walks through each control on the grid and how to save your work as a view.
The grid toolbar
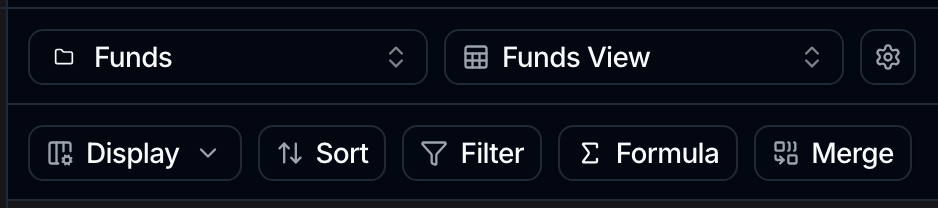
The record grid has two toolbar rows. The top row holds the object selector, the view selector, a gear that opens attribute settings, the edit-records pencil, the archived toggle, Import / Export, and New Record. The second row holds the view controls you'll use most: Display, Sort, Filter, Formula and Merge, with a save control that appears whenever you have unsaved changes.
Everything on this page is available whether or not edit mode is on. The pencil gates changes to the records themselves, not the way you look at them. See Add, edit & import records.
Switch and manage views
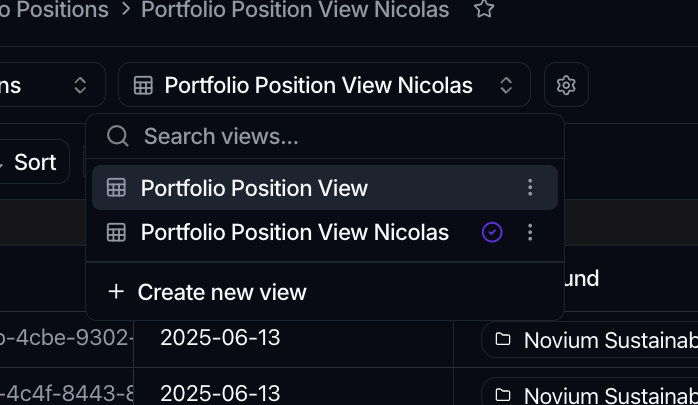
The view selector sits near the top left and shows the current view's name. Click it to open the list.
- Switch view: pick any view from the list. Use the Search views... box to find one by name.
- Create a view: click Create new view at the bottom of the list, enter a View name, and click Create view.
- Duplicate a view: open a view's ⋮ menu (Actions for [view]) and choose Duplicate view. This copies its columns, filters, sorting and aggregations into a new view, so you can branch off an existing setup. The default view can be duplicated even though it can't be renamed or deleted.
- Rename a view: the same ⋮ menu offers Edit name for any view other than the default.
- Delete a view: the ⋮ menu's Delete view removes it after a confirmation. Deleting a view never touches the underlying records.
Choose which columns to display
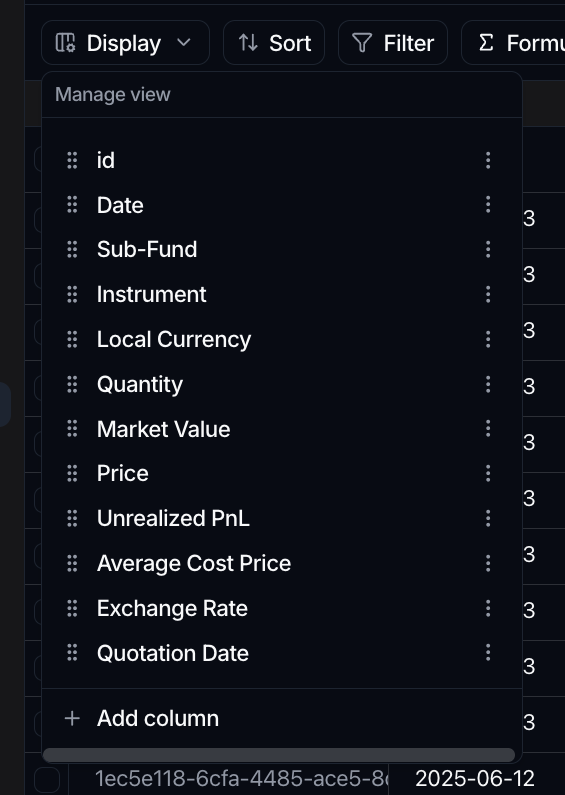
Click Display to manage columns. The panel opens on Manage view, a list of the columns currently shown.
- Add a column: click Add column to open the attribute picker. Search with Search attributes..., then click an attribute to add it. Clicking a column that's already shown removes it.
- Remove a column: open a column's ⋮ in the Manage view list and choose Remove column, or open a column header's menu in the grid and choose Hide from view.
Show a field from a related object
The column picker can reach across relationships, so a view can display data that lives on a linked record.
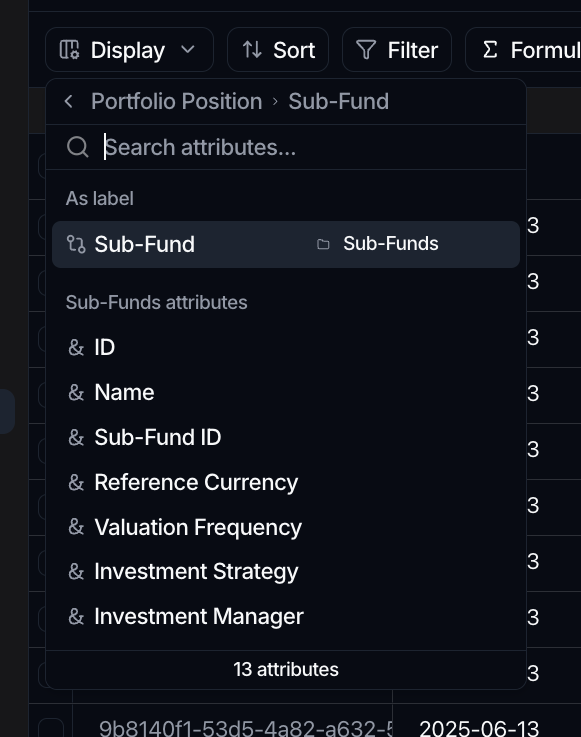
- In Add column, relationship attributes show a chevron on the right. Click one to drill into the related object.
- A breadcrumb shows the path you've followed (source object then the relationship you stepped through); the back arrow returns you one level.
- Pick any attribute of the related object to add it as a column. An As label option adds the related record's display label (its Reference Display) as the column value.
This lets you build, say, a Portfolio Positions view that shows each position's Sub-Fund details without leaving the grid.
Reorder columns
Three ways to change column order, whichever feels natural:
- Drag a column header left or right in the grid.
- Drag the grip handle on a row in the Display → Manage view list.
- Use a column header's menu and choose Move to left or Move to right.
The system id column stays pinned to the left and can't be moved.
Filter
- Click Filter on the grid.
- Pick the attribute to filter on.
- Choose a condition and enter a value.
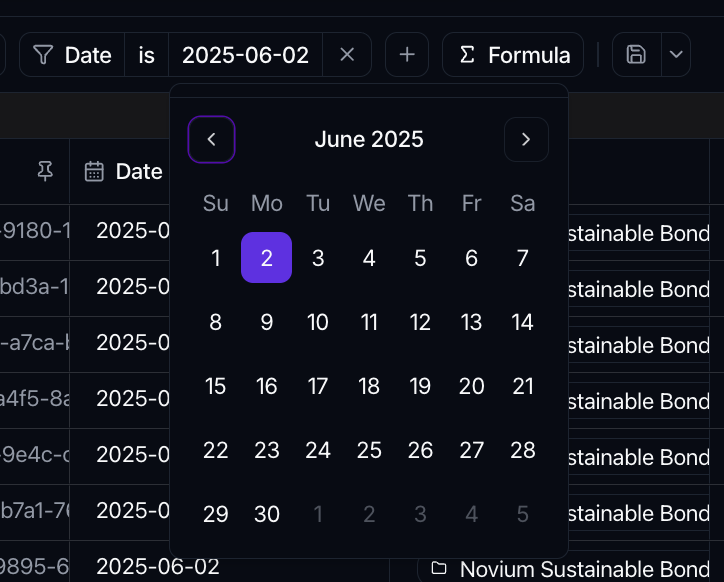
The available conditions depend on the attribute type. Text offers contains, not contains, starts with, ends with, is, is not, empty and not empty. Numbers offer equals, greater than, less than and the related comparisons. Dates offer before, after and between. Relationship fields offer includes and not includes. Add more conditions with the + control.
Boolean attributes are a value picker rather than a text box: choose true or false from the list instead of typing a word that has to match. Leave the value unset and the row shows its placeholder, so a half-built boolean condition is obvious rather than silently matching nothing.
The system Created at and Updated at columns filter as dates, with the same before, after and between conditions as any other date, rather than as text.
Advanced filters
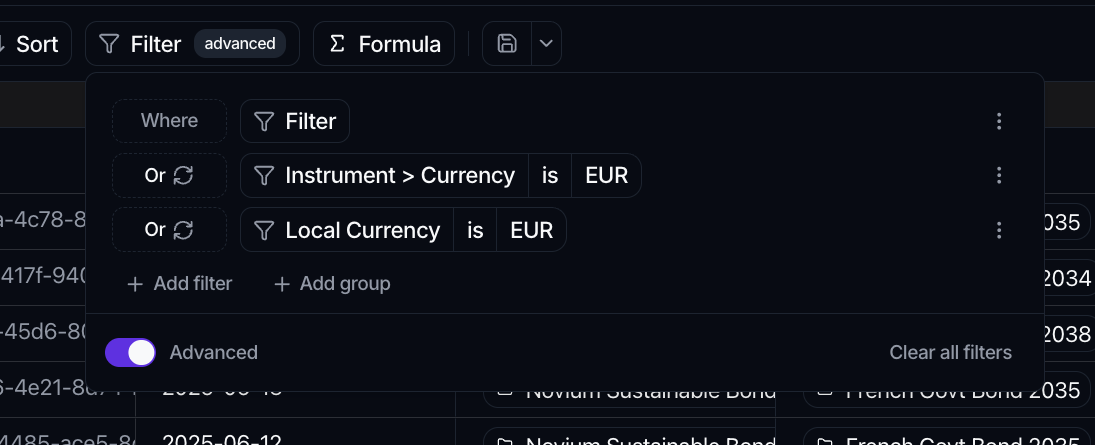
For anything beyond a flat list of conditions, turn on the Advanced filter switch at the bottom of the filter panel. The Filter button then shows an advanced badge, highlighted while an advanced filter is actually applied so you can tell at a glance that the grid is scoped by more than the conditions on show. The builder gives you full boolean logic:
- Each condition sits under a logic label. The first row reads Where, and every following row toggles between And and Or.
- Add filter adds another condition; Add group starts a nested group with its own logic, so you can express things like (status is Open And amount greater than 1000) Or priority is High. Conditions can also reach across relationships, for example Instrument > Currency is EUR.
- Remove a nested group with Delete group, and reset everything with Clear all filters.
Turn the Advanced switch off to collapse back to the simple filter.
Sort
- Click Sort on the grid.
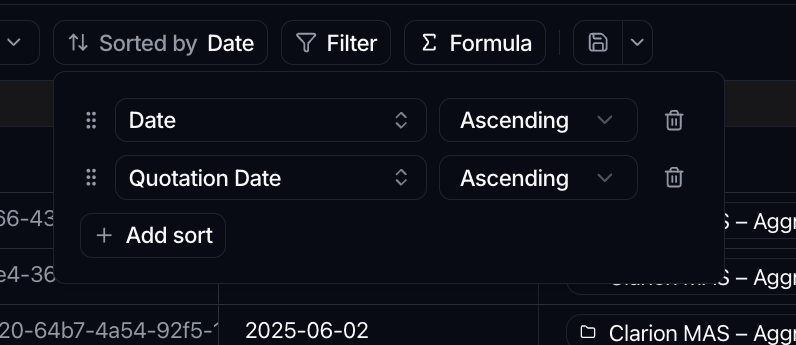
- Choose an attribute and set the direction to ascending or descending.
- Click Add sort to add another level.
- Drag the rows to change which sort applies first.
The button label updates to Sorted by with the leading attribute, so the active order is always visible.
When two attributes share a display name, the sort list shows each one's slug beside it so you can tell them apart. Attributes with a name of their own show no slug, since they need no disambiguating.
Picking values in a filter
Filters on relationship, user and option attributes open a searchable picker rather than a text field. The values you have already chosen are listed first, above the rest, so a long list never hides your own selection and unticking something does not mean hunting for it again.
Total a column with an aggregation
Any column can show an aggregate in the totals row pinned at the bottom of the grid.
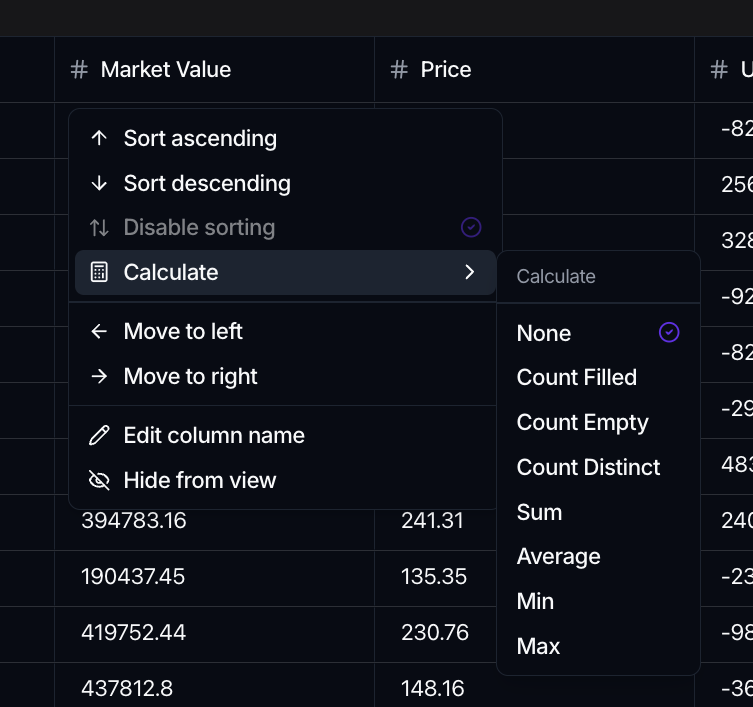
- Open a column header's menu and choose Calculate.
- Pick an aggregation. Number and formula columns offer Sum, Average, Min, Max, Count Filled, Count Empty, and Count Distinct. Other column types offer the three Count options only.
- The result appears in the bottom totals row, with a short suffix naming the metric. Choose None to clear it.
Aggregations are part of the view, so save the view to keep them.
Show columns from another object
Merge borrows columns from a second data object and shows them beside your own, so a view can answer a question that spans two objects without exporting anything. Your row count never changes and the borrowed columns are read-only.
See Merge with other data for the full walkthrough.
Add a formula column
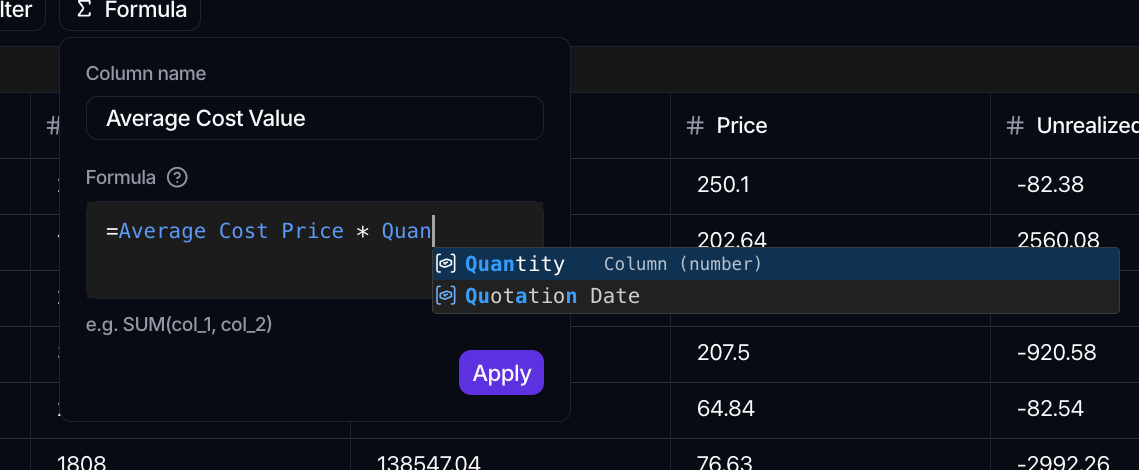
The Formula button adds a computed column to the current view without changing the object's stored attributes.
- Click Formula on the grid.
- Enter a Column name.
- Write the expression in the editor. The help icon lists the available functions, and the hint shows the shape, for example
SUM(col_1, col_2). Column names autocomplete as you type. - Click Apply to add the column.
The new column is computed for every row and is read-only. It lives in the view, so save the view to keep it. If you instead want a permanent formula stored on the object itself, create a Formula attribute from Manage; see Attribute types.
Archive, restore and delete records in bulk
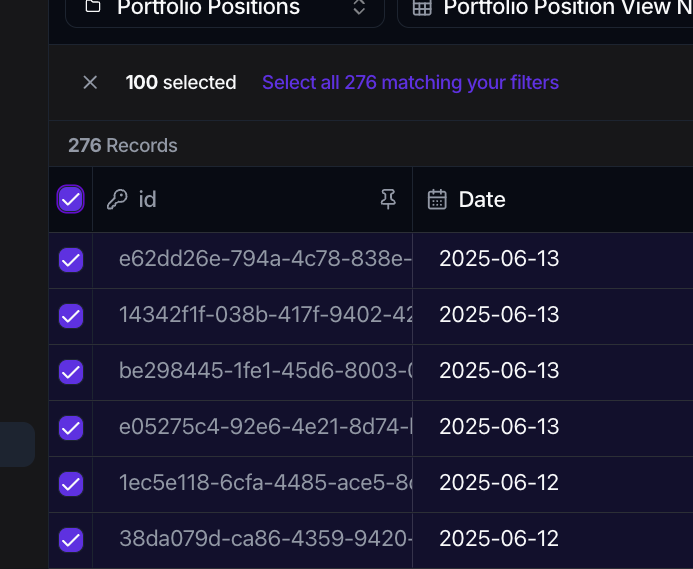
Select records with the checkboxes at the left of the grid. The header checkbox selects everything loaded, and if more rows match your filters a prompt offers Select all N matching your filters. While records are selected, a bar shows N selected with actions on the right:
- Archive hides the records from active views without deleting them.
- Delete removes them permanently, after a dialog that previews the impact (including how many related records are detached or also deleted). See Add, edit & import records for the detail.
See and restore archived records
Archived records are hidden by default. To work with them, click the archive icon in the top toolbar to toggle Show archived. Archived rows appear read-only and greyed. Select the ones you want and click Restore to bring them back into active views, then toggle Hide archived to return to the normal grid.
Export the view as a CSV
The same Import / Export button that imports data also exports it. Click Import / Export, stay on the Export tab, and click Export. The file downloads as a CSV named with the date and time of the export, for example export_20260812T093000.csv.
Export uses the current view, so the file matches what's on screen: the active filters decide which records are included, the sort sets the row order, and the visible columns decide which attributes are written out. Adjust those first to shape the file. Export writes the first 10K records that match; if the object is larger, narrow it with filters and export in batches.
Save your work as a view
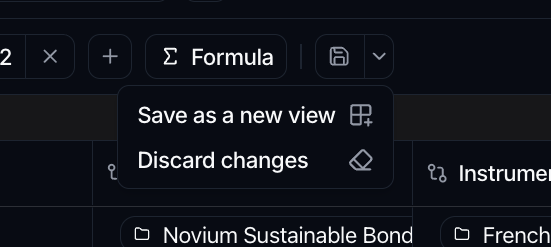
Changing columns, filters, sorting, aggregations or formulas marks the view as edited, and a save control appears on the toolbar:
- Click the save icon to update the current view in place.
- Open its dropdown for Save as a new view (keep the current view and store a copy) or Discard changes (drop your edits and return to the saved state).
Saving the default view prompts you to create a new view instead, so the default stays clean. In the Create new view dialog, enter a View name and click Create view.