Tools
Give an agent concrete actions it can take, from reading data to running workflows.
A tool is a concrete capability an agent can call to take an action, like reading a data object, uploading a file, or running a workflow. Tools are how an agent does things rather than just talks about them. This page covers where tools come from, how to give them to an agent, and how to control which tools are available.
Where tools come from
Every tool is provided by a connector. The built-in Spark connector supplies the platform's own tools (working with your data, files, tasks, workflows, and canvases), and each additional connector you activate contributes its own tools. For example, Spark's CreateCanvas tool lets an agent build a data-driven canvas, or update one in place. Manage connectors under Settings > Agent > Connectors; see Connectors (MCP) for how to activate them.
Activating a connector makes its tools available in the workspace. It does not attach them to any agent on its own. You still choose the specific tools for each agent in the agent editor, described next.
Add tools to an agent
- In the left sidebar, open the Settings tab, then under Agent select Agents.
- Open an agent (or click New to create one).
- In the Agent details card, find the Tools section and open its selector.
- Search and pick the tools you want.
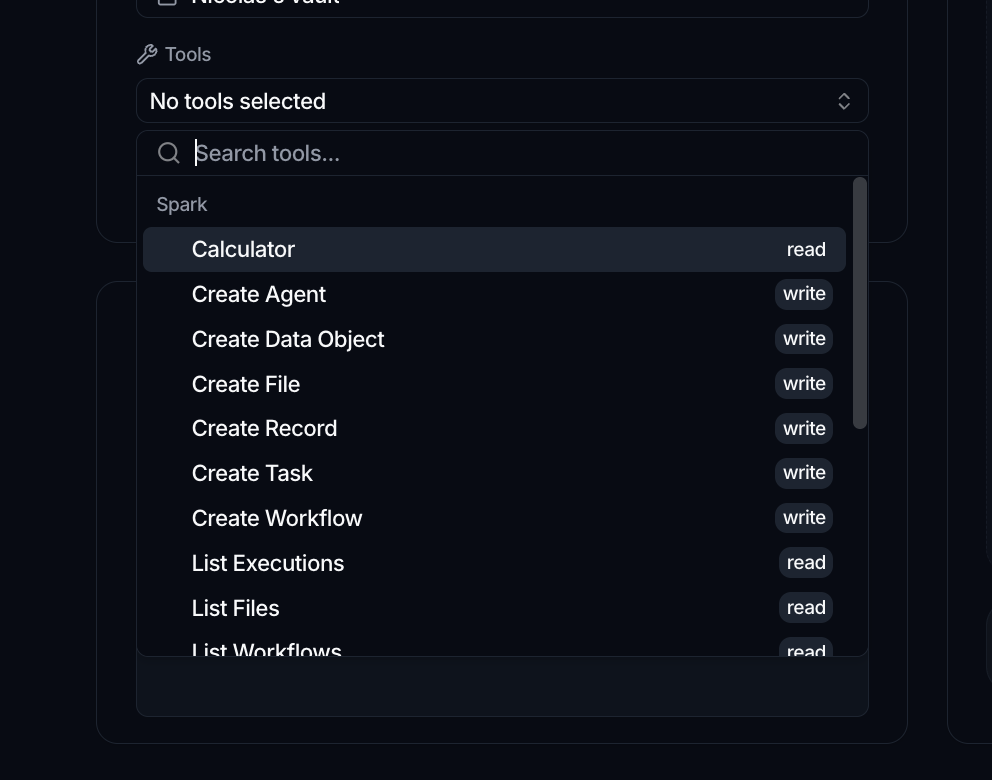
The selector is a searchable list. Before you pick anything it reads No tools selected; type in the Search tools... box to filter, and if nothing matches it shows No tools found.. Selected tools appear as small chips (Spark's own tools carry the Spark logo); when there are more than a couple, the extras collapse into a +N count.
To add several tools at once, shift-click: click one tool, then shift-click another to select every tool in between (within whatever the search is currently showing).
Tools are grouped in the list by category, and each one may show a short tag next to its name. Only tools meant for direct use appear here, so the list stays focused on things an agent can actually be given.
If a tool comes from an external connector that needs credentials, the agent also needs a Vault. The editor's Vault field becomes required as soon as you add such a tool. See Vaults.
Control which tools a connector offers
You can enable or disable individual tools for a connector across the whole workspace, which is broader than per-agent selection. Open Settings > Agent > Connectors, open a connector's ⋮ menu, and choose Manage (or See tools to just review the list without changing anything).
On the connector's detail page each tool has an Allow toggle. Turning it off removes that tool from the pool everyone can add to their agents; turning it on restores it. Tools are grouped by area (for example data, file, task, workflow, and utility). The built-in Spark connector is a special case: its tools are always available, so their toggles are disabled and read Built-in tools are always available.
How tools show up in a chat
When an agent uses a tool during a conversation, the message trace shows it as a labeled step with a wrench icon and the tool's name. You can expand a step to see its details, and a short summary such as Agent used 3 tools sits above the answer. This is how you follow what the agent actually did. For more on reading a conversation, see Chat with an agent.